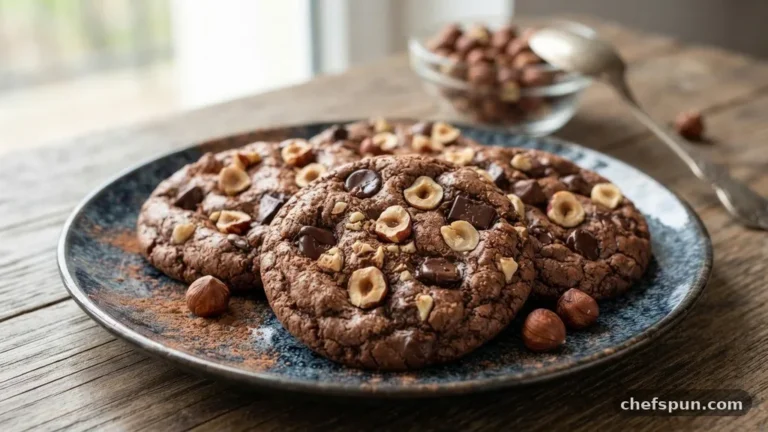
Black Bean Brownie
A black bean brownie serves as a clever bridge between indulgent dessert and fiber-rich nutrition. You might wonder if legumes have a place in a chocolate treat, but the results are surprisingly fudgy and rich. By replacing traditional flour with pureed beans, you create a dense, moist texture that satisfies any chocolate craving without the heaviness of refined grains.
Whether you follow a specific dietary path or just want to sneak some extra nutrients into your day, this approach yields a delicious outcome. Preparing a batch is straightforward, requiring only a few pantry staples and a reliable food processor to achieve a smooth, decadent consistency.
- Prep time: 15 minutes
- Cook time: 30 minutes
- Total time: 45 minutes
- Servings: 4
- Calories: 420 per serving
Ingredients

- 1 can (15 ounces) black beans, rinsed and drained thoroughly
- 3 large eggs
- 3 tablespoons vegetable oil or melted coconut oil
- 1/2 cup unsweetened cocoa powder
- 3/4 cup granulated sugar
- 1 teaspoon vanilla extract
- 1/2 teaspoon baking soda
- 1/4 teaspoon salt
- 1/2 cup semi-sweet chocolate chips
Instructions
- Preheat your oven to 350 degrees Fahrenheit and lightly grease an 8×8-inch baking dish with cooking spray or a thin layer of oil.
- Place the rinsed and well-drained black beans into your food processor or high-speed blender.
- Add the eggs, oil, cocoa powder, sugar, vanilla extract, baking soda, and salt to the processor bowl.
- Blend the mixture on high speed for at least 2 minutes until the batter is completely smooth and no visible bean skins remain.
- Scrape down the sides of the container with a spatula to ensure all dry ingredients are fully incorporated into the wet base.
- Fold in half of the chocolate chips by hand using a sturdy spatula so they remain whole throughout the batter.
- Pour the finished batter into your prepared baking dish, smoothing the top with the back of your spoon.
- Sprinkle the remaining chocolate chips over the surface of the brownie batter for an extra layer of decadence.
- Bake for 30 minutes, or until the edges are set and a toothpick inserted into the center comes out with just a few moist crumbs.
- Allow the dessert to cool completely in the pan for at least 20 minutes before attempting to slice, as this helps the structure set properly.
Understanding the Role of Legumes in Baking
Using a bean-based foundation in your baking might sound unconventional, but it functions similarly to pureed fruit or yogurt in traditional recipes. The black bean provides the bulk and moisture that flour usually supplies, but it does so while offering a higher protein and fiber profile.
Because the beans are neutral in flavor once combined with dark cocoa powder, you rarely detect a “beany” taste. Instead, the cocoa masks the earthiness, allowing the natural creaminess of the legume to mimic the texture of a classic fudge brownie.
This technique is particularly useful for those who need to avoid gluten. Many wheat-free alternatives can result in dry, crumbly products, but the starch profile of the bean keeps the crumb soft and dense.
If you are interested in the nutritional properties of different plant-based proteins, you can learn more about the dietary benefits of pulses through official government resources. By blending the beans until they are completely liquefied, you ensure that the final result remains uniform and smooth.
Achieving the Perfect Fudgy Texture
The secret to a great brownie lies in the balance between fat and moisture. When you utilize the black bean as a base, you are inherently adding moisture that doesn’t evaporate as quickly as it does in flour-based treats.
You should be careful not to overbake the dish, as this can cause the edges to become tough while the center loses its signature fudgy quality. Always watch the clock closely once you hit the 25-minute mark to check for doneness.
Texture is also dictated by the equipment you use. A high-powered blender or food processor is necessary to break down the bean skins, which can otherwise leave small, gritty bits in your mouth.
If you find your batter looks too thick after blending, add a single teaspoon of water or coffee to loosen it up. The inclusion of chocolate chips also adds pockets of melted fat, which enhances the perception of richness in every bite.
Customizing Your Chocolate Experience
While the core recipe relies on cocoa powder and sugar, you have plenty of room to experiment with flavors. Many bakers like to add a dash of espresso powder, which deepens the chocolate profile and makes the brownie taste more sophisticated.
You could also stir in chopped walnuts or pecans to provide a necessary crunch against the smooth, dense interior. If you prefer a more intense experience, use dark chocolate chunks instead of standard chips.
Those looking to modify the sweetness level can swap the granulated sugar for coconut sugar or maple syrup, though keep in mind that liquid sweeteners may require a slightly longer bake time. If you want to keep the recipe strictly vegan, you can replace the eggs with a “flax egg” mixture, consisting of ground flaxseed meal and water.
This adjustment might yield a slightly softer brownie, so ensure you give it plenty of time to cool before serving. Always taste your batter before baking to ensure the sweetness level matches your personal preference.
Storing and Serving Considerations
Because these brownies contain more moisture than traditional flour-based versions, they are best stored in the refrigerator. Keeping them chilled prevents the structure from becoming too soft and helps maintain that dense, fudge-like mouthfeel.
You can keep them in an airtight container for up to five days, or freeze individual squares for up to three months. If you freeze them, simply let them thaw on the counter for twenty minutes before enjoying.
When serving, consider warming a square slightly in the microwave for ten seconds to soften the chocolate chips. A small dollop of whipped cream or a scoop of dairy-free vanilla ice cream makes a fantastic accompaniment.
The contrast between the warm, dense chocolate and the cold topping creates a balanced dessert experience. Because this treat is quite rich and satisfying, smaller portions are often sufficient to satisfy a sweet tooth.

Common Troubleshooting Tips
If your brownies seem to fall apart when you slice them, you likely cut into them while they were still too warm. The cooling process is essential for the proteins and starches to settle into a cohesive structure.
Always be patient during the cooling phase, as the residual heat continues to cook the center slightly after it leaves the oven. If the top looks too dry, you may have used too much cocoa powder or not enough fat; ensure you measure your cocoa by spooning it into the measuring cup rather than scooping it directly.
Another common issue involves the beans themselves. If you use canned beans with added salt, remember to reduce the additional salt in the recipe to prevent an overly savory result.
Always rinse your beans thoroughly under cold water to remove the excess starch and sodium found in the canning liquid. If you want to experiment with different varieties, kidney or pinto beans can also work, though they may slightly alter the final color and flavor profile compared to the classic black bean option.
Final Thoughts on Nutrient-Dense Baking
Incorporating a black bean brownie into your dessert rotation is a simple way to enjoy a treat that feels indulgent while offering significant nutritional benefits. By focusing on high-quality cocoa and ensuring a smooth blend, you transform pantry staples into a sophisticated, fudgy masterpiece.
This recipe proves that you do not need to sacrifice flavor or texture to experiment with healthier ingredients in your kitchen. Whether you are baking for guests with dietary restrictions or simply looking for a new favorite snack, this approach delivers consistently delicious results.
As you become more comfortable with the process, feel free to adjust the ratios to suit your personal palate. The beauty of this dish lies in its versatility and its forgiving nature.
Once you master the basic technique, you will find that these brownies become a staple in your home. We hope you enjoy making this unique recipe as much as we do, and we encourage you to share your results or your favorite customizations with others.
Black Bean Brownie
A black bean brownie serves as a clever bridge between indulgent dessert and fiber-rich nutrition. You might wonder if legumes have a place in a chocolate treat, but the results are surprisingly fudgy and rich.
Ingredients
- 1 can (15 ounces) black beans , rinsed and drained thoroughly
- 3 large eggs
- 3 tablespoons vegetable oil or melted coconut oil
- 1/2 cup unsweetened cocoa powder
- 3/4 cup granulated sugar
- 1 teaspoon vanilla extract
- 1/2 teaspoon baking soda
- 1/4 teaspoon salt
- 1/2 cup semi-sweet chocolate chips
Instructions
- Preheat your oven to 350 degrees Fahrenheit and lightly grease an 8×8-inch baking dish with cooking spray or a thin layer of oil.
- Place the rinsed and well-drained black beans into your food processor or high-speed blender .
- Add the eggs, oil, cocoa powder, sugar, vanilla extract, baking soda, and salt to the processor bowl.
- Blend the mixture on high speed for at least 2 minutes until the batter is completely smooth and no visible bean skins remain.
- Scrape down the sides of the container with a spatula to ensure all dry ingredients are fully incorporated into the wet base.
- Fold in half of the chocolate chips by hand using a sturdy spatula so they remain whole throughout the batter.
- Pour the finished batter into your prepared baking dish, smoothing the top with the back of your spoon.
- Sprinkle the remaining chocolate chips over the surface of the brownie batter for an extra layer of decadence.
- Bake for 30 minutes, or until the edges are set and a toothpick inserted into the center comes out with just a few moist crumbs.
- Allow the dessert to cool completely in the pan for at least 20 minutes before attempting to slice, as this helps the structure set properly.
Similar Posts
Almond Crescent Cookies Healthy
Making almond crescent cookies healthy is a rewarding process that transforms a classic holiday treat into a nutrient-dense snack. By swapping processed white flour and refined sugars for wholesome alternatives, you can enjoy these delicate, nutty delights without the typical sugar crash. You will find that these treats offer a satisfying crunch and a rich,…
Healthy Christmas Cookies
Making healthy Christmas cookies allows you to enjoy the festive season without sacrificing your nutritional goals. By swapping refined sugars for natural sweeteners and choosing nutrient-dense flours, you can create treats that satisfy your sweet tooth while keeping blood sugar levels more stable. These mindful adjustments ensure that every bite remains delicious, festive, and satisfying…
Chocolate Hazelnut Cookies
Baking a batch of homemade Chocolate Hazelnut Cookies brings a sophisticated twist to the classic pantry staple. These treats balance the deep, earthy richness of roasted nuts with the smooth sweetness of cocoa, creating a flavor profile that is nearly impossible to resist. Whether you are prepping for a holiday gathering or simply satisfying a…
Vegan Butternut Squash Recipes
Exploring the versatility of vegan butternut squash recipes allows home cooks to transform humble, earth-grown produce into sophisticated meals. Whether you are seeking a hearty soup for a cold evening or a vibrant roasted side dish, this gourd provides a naturally sweet foundation that balances beautifully with savory spices. By understanding how to properly caramelize…
Best Vegan Christmas Recipes
Finding the best Vegan Christmas Recipes that satisfy both plant-based eaters and traditionalists can transform your holiday table. Whether you are planning a full plant-based feast or just looking for a standout main dish, these selections focus on deep flavors, festive colors, and satisfying textures. You will find that these dishes hold their own against…
Healthy Halloween Treats
Preparing healthy Halloween treats allows you to celebrate the spooky season without the typical post-sugar crash. By focusing on whole foods like fresh fruit, nuts, and natural sweeteners, you can create snacks that look festive while fueling the body properly. Whether you are hosting a party for little ones or looking for a wholesome snack…