Roasted Chickpeas
Roasted Chickpeas are a fantastic way to transform humble pantry staples into a satisfying, flavorful treat. By using oven roasting, you can turn canned chickpeas into a crunchy, protein-packed snack that rivals any processed alternative. This simple method relies on careful moisture management to ensure each bite delivers a satisfying crunch.
Whether you prefer them savory, spicy, or sweet, mastering the technique for these legumes provides a versatile base for many culinary experiments. You will find that these crispy delights are not only easy to prepare but also fit perfectly into a plant-based diet.
- Prep time: 15 minutes
- Cook time: 30 minutes
- Total time: 45 minutes
- Servings: 4
- Calories: 420 per serving
Ingredients
- 2 cans (15 oz each) of chickpeas, drained and rinsed
- 2 tbsp extra virgin olive oil
- 1 tsp sea salt
- 1 tsp garlic powder
- 1 tsp smoked paprika
- 0.5 tsp ground cumin
- 0.25 tsp cayenne pepper (optional, for heat)
Instructions
- Preheat your oven to 400°F (200°C) and position a rack in the center.
- Drain the garbanzo beans into a colander and rinse thoroughly under cool running water.
- Spread the beans across a clean kitchen towel or paper towels and pat them until completely dry.
- Remove any loose skins that fall off during the drying process, as these can burn quickly.
- Transfer the dried legumes to a large mixing bowl and toss with olive oil until every bean is evenly coated.
- Line a large baking sheet with parchment paper to prevent sticking and ensure even heat distribution.
- Spread the beans in a single layer on the baking sheet, ensuring they are not crowded.
- Roast for 20 minutes, then remove the pan and shake it to redistribute the beans for even browning.
- Continue roasting for another 10 to 15 minutes, or until the chickpeas are deep golden brown and dry to the touch.
- Remove from the oven, immediately toss with your desired seasoning blend, and let them cool completely on the tray to crisp up.
The Science of Crispy Legumes
Achieving that signature crunch in roasted chickpeas requires a deep understanding of moisture control. The primary goal is to dehydrate the exterior of the legume while maintaining a tender interior.
When you introduce heat, the water inside the bean begins to evaporate. If the chickpeas are damp when they hit the oven, they will steam instead of roast, leading to a chewy texture rather than a crisp one.
Parchment paper plays a vital role in this process by preventing the beans from direct contact with the hot metal of the baking sheet. This barrier encourages even cooking and prevents the sugars on the surface of the beans from caramelizing into a burnt mess.
You should always ensure your oven is fully preheated before putting the tray inside. A consistent temperature is necessary to create the right environment for moisture to escape efficiently.
Selecting and Preparing Your Beans
While you can use dried beans that have been soaked and boiled, canned chickpeas are the gold standard for convenience. They are readily available and come pre-cooked, saving you hours of preparation time.
When selecting your cans, look for varieties that are firm and intact, as mushy beans will not hold their shape during the high-heat process. Always rinse them thoroughly to remove the excess starch found in the canning liquid.
This liquid, often known as aquafaba, is highly useful in other recipes like vegan meringues, so don’t feel guilty about draining it away for this purpose. Once rinsed, the drying step is non-negotiable. You can read more about the nutritional profile of these versatile legumes on the Harvard T.H.
Chan School of Public Health website. Proper preparation creates the foundation for a successful snack.
Mastering the Seasoning Process
The secret to flavorful Roasted Chickpeas lies in the timing of your seasoning. Many beginners make the mistake of adding dry spices before putting the tray in the oven.
High heat can cause delicate spices like garlic powder or paprika to burn and turn bitter. It is far more effective to roast the beans in just oil and salt, then toss them with your spice blend immediately after they come out of the oven.
The residual oil on the hot beans acts as an adhesive, allowing the seasonings to coat every crevice perfectly. If you want a more complex profile, try mixing your smoked paprika and cumin with a touch of nutritional yeast or even a small amount of brown sugar for a sweet-and-savory contrast.
Experimenting with different flavor profiles allows you to tailor this snack food to your personal taste buds. Start with the basics and branch out as you become more confident in the kitchen.
Equipment Matters
The type of baking sheet you use can significantly impact your results. A heavy-duty, light-colored aluminum baking sheet is ideal because it reflects heat evenly without causing the bottoms to scorch.
If you have an air fryer, you can also use it to achieve a similar result in a shorter amount of time. Air fryers operate using convection, which circulates hot air rapidly to dehydrate the surface of the food much faster than a standard oven.
If you choose to use an air fryer, keep a close eye on the cooking time, as the intense airflow will finish the job in roughly 15 to 20 minutes. Regardless of your equipment, avoid overcrowding the pan.
If the beans are piled on top of each other, they will create steam and become soft. Always prioritize surface area to ensure every individual chickpea gets the attention it needs to become crispy.
Storage and Shelf Life
One of the most common complaints about this snack is that it loses its crunch after a day or two. This happens because the starch in the legume is hygroscopic, meaning it absorbs moisture from the surrounding air.
To keep them at their best, store them in a container that is not completely airtight, or keep them in a paper bag. This allows a small amount of airflow, which helps maintain the texture.
If you find that your batch has gone soft, you can easily revive them. Simply place them back on a baking sheet in a 350°F oven for about 5 minutes.
This quick refresh will draw out the excess moisture and return them to their original glory. It is best to consume them within three days, though they rarely last that long in most households.
Common Mistakes to Avoid
Many people struggle with burning their chickpeas because they try to rush the process by cranking the heat too high. While you want a hot oven, anything over 425°F is likely to char the outside before the inside has finished drying.
Another frequent error is failing to shake the pan halfway through the cooking process. Without this movement, the sides touching the pan will overcook while the tops remain soft.
Do not be tempted to add wet ingredients like vinegar or hot sauce during the roasting phase. These liquids will introduce moisture back into the pan, which is the exact opposite of what you want to achieve.
Save your wet flavorings for a final drizzle after the beans have cooled, or stick to dry rubs for the most consistent results. Learning from these small errors will help you achieve the perfect crunch every single time.
Integrating into a Plant-Based Diet
These legumes are a powerhouse of nutrition, offering both plant-based protein and fiber in every serving. As a healthy snack, they provide a much better alternative to processed chips or crackers.
They are naturally gluten-free and can be easily adapted to suit various dietary preferences, such as vegan or low-sodium diets. Because they are so filling, they make an excellent addition to salads, soups, or even as a topping for grain bowls.
Incorporating more legumes into your routine is a simple way to improve your overall dietary quality. The high fiber content keeps you feeling full longer, which can help curb cravings for less nutritious snack foods.
By keeping a few cans of chickpeas in your pantry, you always have the raw materials for a healthy, homemade treat. It is a simple shift that pays dividends for your health and your palate.
FAQ
Can I use frozen chickpeas?
You can use frozen chickpeas, but you must thaw and dry them thoroughly before roasting. Any residual ice crystals will melt and create steam, preventing the beans from becoming crispy.
Do I have to peel the skins off?
You do not have to peel them intentionally, but many skins will fall off naturally during the drying and tossing process. It is best to remove any loose skins that are already detached, as they tend to burn faster than the bean itself.
Why are my chickpeas still soft after roasting?
Your chickpeas are likely soft because they were not dried enough before roasting or because they were crowded on the baking sheet. Ensure they are completely dry to the touch before adding oil, and give them plenty of space on the pan to allow air to circulate.
Can I make these sweet instead of savory?
Absolutely, you can omit the garlic, cumin, and paprika and replace them with cinnamon, ginger, or cocoa powder. Toss them with a little bit of maple syrup or honey immediately after roasting for a delicious, crunchy dessert snack.
What is the best way to keep them crunchy?
Store them in a jar with the lid slightly ajar or in a paper bag to allow moisture to escape. If they soften, a quick five-minute toast in the oven will restore their texture.
Final Thoughts
Roasted Chickpeas are a testament to how simple ingredients can yield impressive results when treated with the right techniques. By focusing on proper drying and patient roasting, you can create a reliable snack that satisfies the craving for something salty and crunchy. This method is incredibly forgiving once you understand the role of moisture, allowing you to experiment with endless combinations of spices and herbs.
Whether you are looking for a quick afternoon pick-me-up or a nutritious topping for your favorite meals, this versatile legume is ready to perform. Start with the suggested measurements and feel free to adjust the seasonings to match your own preferences. Enjoy the process of perfecting your own version of these crispy, healthy bites.
Roasted Chickpeas
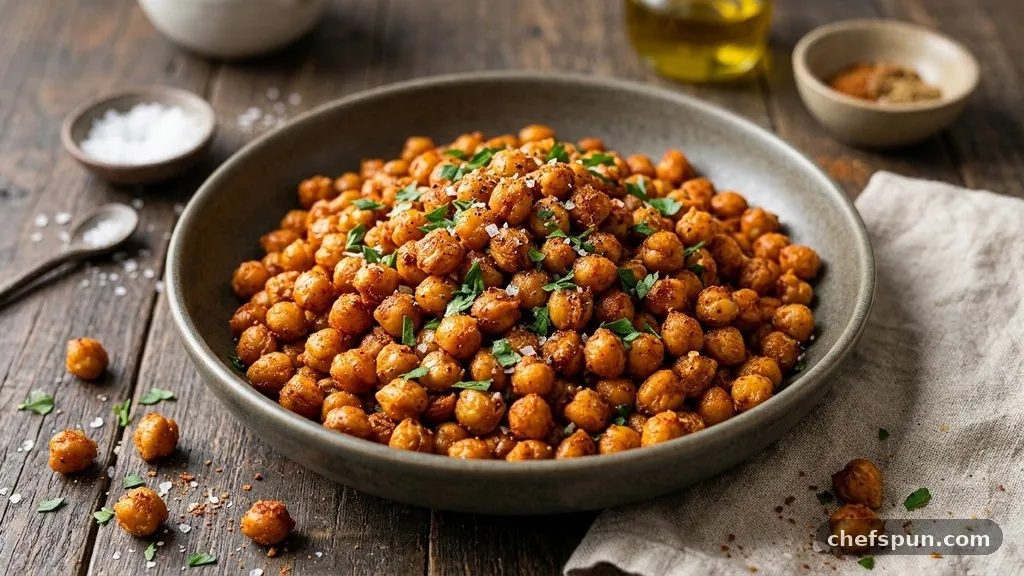
Roasted Chickpeas are a fantastic way to transform humble pantry staples into a satisfying, flavorful treat. By using oven roasting , you can turn canned chickpeas into a crunchy, protein-packed snack that rivals any processed alternative.
Ingredients
- 2 cans (15 oz each) of chickpeas, drained and rinsed
- 2 tbsp extra virgin olive oil
- 1 tsp sea salt
- 1 tsp garlic powder
- 1 tsp smoked paprika
- 0.5 tsp ground cumin
- 0.25 tsp cayenne pepper (optional, for heat)
Instructions
- Preheat your oven to 400°F (200°C) and position a rack in the center.
- Drain the garbanzo beans into a colander and rinse thoroughly under cool running water.
- Spread the beans across a clean kitchen towel or paper towels and pat them until completely dry.
- Remove any loose skins that fall off during the drying process, as these can burn quickly.
- Transfer the dried legumes to a large mixing bowl and toss with olive oil until every bean is evenly coated.
- Line a large baking sheet with parchment paper to prevent sticking and ensure even heat distribution.
- Spread the beans in a single layer on the baking sheet, ensuring they are not crowded.
- Roast for 20 minutes, then remove the pan and shake it to redistribute the beans for even browning.
- Continue roasting for another 10 to 15 minutes, or until the chickpeas are deep golden brown and dry to the touch.
- Remove from the oven, immediately toss with your desired seasoning blend, and let them cool completely on the tray to crisp up.
Similar Posts
Monk Fruit Jam Almond Thumbprint Cookies
If you are looking for a satisfying treat that aligns with your dietary goals, these Monk Fruit Jam Almond Thumbprint Cookies are a perfect choice. They combine the nutty, rich flavor of almond flour with the subtle, natural sweetness of monk fruit, creating a texture that is both tender and crumbly. By using sugar–free fruit…
Best Vegan Christmas Recipes
Finding the best Vegan Christmas Recipes that satisfy both plant-based eaters and traditionalists can transform your holiday table. Whether you are planning a full plant-based feast or just looking for a standout main dish, these selections focus on deep flavors, festive colors, and satisfying textures. You will find that these dishes hold their own against…
Healthy Christmas Cookies
Making healthy Christmas cookies allows you to enjoy the festive season without sacrificing your nutritional goals. By swapping refined sugars for natural sweeteners and choosing nutrient-dense flours, you can create treats that satisfy your sweet tooth while keeping blood sugar levels more stable. These mindful adjustments ensure that every bite remains delicious, festive, and satisfying…
Keto Coconut Flour Almond Crescent Cookies Healthy
Finding the perfect treat that aligns with a low-carb lifestyle can feel like a challenge, but baking Keto Coconut Flour Almond Crescent Cookies Healthy treats is a simple way to satisfy your cravings. These cookies offer a delicate, nutty flavor and a melt-in-your-mouth texture that rivals traditional holiday baking. By combining the fibrous nature of…
Healthy Halloween Treats
Preparing healthy Halloween treats allows you to celebrate the spooky season without the typical post-sugar crash. By focusing on whole foods like fresh fruit, nuts, and natural sweeteners, you can create snacks that look festive while fueling the body properly. Whether you are hosting a party for little ones or looking for a wholesome snack…
Strawberry Overnight Oats
Starting your day with a bowl of Strawberry Overnight Oats provides a refreshing, nutrient-dense breakfast that requires almost zero effort in the morning. By combining simple ingredients in a jar the night before, you allow the components to soften and meld into a creamy, pudding-like consistency while you sleep. This method is perfect for anyone…