Nori Chips
Nori Chips offer a satisfying, crunchy alternative to traditional potato-based snacks, bringing the deep, oceanic essence of the sea directly to your pantry. These thin, crispy sheets provide a concentrated burst of umami that keeps you reaching for another bite without the heavy feeling often associated with fried snacks.
Whether you are craving a light afternoon pick-me-up or a sophisticated base for appetizers, these sheets deliver a distinct flavor profile that stands out in any snack rotation. Learning to make them at home allows you to control the seasoning and quality of your ingredients, ensuring a fresher result than many store-bought varieties.
- Prep time: 15 minutes
- Cook time: 30 minutes
- Total time: 45 minutes
- Servings: 4
- Calories: 420 per serving
Ingredients
- 8 sheets of high-quality, unseasoned toasted nori
- 2 tbsp toasted sesame oil
- 1 tsp fine sea salt
- 1 tbsp tamari or soy sauce
- 1 tbsp maple syrup or honey
- 1/2 tsp garlic powder
- 1/4 tsp chili flakes (optional for heat)
Instructions
- Preheat your oven to 300°F (150°C) and line a large baking sheet with parchment paper to prevent sticking.
- In a small bowl, whisk together the sesame oil, tamari, maple syrup, garlic powder, and chili flakes until the mixture is emulsified.
- Lay out four sheets of nori on a clean, dry cutting board, ensuring they are flat and free of moisture.
- Use a food-safe pastry brush to lightly coat one side of each nori sheet with a thin, even layer of the prepared oil mixture.
- Place another sheet of nori directly on top of the coated sheet to create a double-layered stack, pressing lightly to encourage them to adhere.
- Brush the top of the stacked sheets with a final, very light layer of the oil mixture and sprinkle evenly with the sea salt.
- Use sharp kitchen shears to cut the stacked sheets into your desired chip size, such as squares or long rectangles.
- Arrange the pieces in a single layer on the prepared baking sheet, ensuring they do not overlap.
- Bake for 8 to 10 minutes, checking frequently, until the sheets are crispy and slightly darkened; watch closely to avoid burning.
- Remove from the oven and allow them to cool completely on the tray, as they will crisp up further while resting.
The Science of Seaweed
The primary component of these snacks, Pyropia, is a genus of red algae that has been cultivated for centuries in coastal regions. Processing: The algae is shredded, washed, and pressed into thin, square sheets. This traditional method preserves the integrity of the plant while creating a manageable format for culinary use.
When you transform these sheets into chips, you are engaging with a food source that is highly efficient to produce and nutrient-dense. The drying process concentrates the flavors, allowing the natural saltiness and umami to become more pronounced.
Choosing High-Quality Nori Products
When shopping for seaweed snacks, dark green hues are generally an indicator of superior quality and freshness. Avoid sheets that appear yellowed or overly translucent, as these may be aged or exposed to improper storage conditions. A glossy sheen on one side is normal, but the texture should remain uniform and free of holes or debris.
Many people find that sourcing organic, sustainably harvested options ensures the best flavor and minimal environmental impact. Checking the origin of the marine harvest can also help you identify products that adhere to higher safety and quality standards.
Nutritional Profile and Benefits
Seaweed is a powerhouse of essential minerals, most notably iodine, which is critical for thyroid function. Beyond their flavor, so moderation is recommended. They are also a notable source of vitamin A, and iron.
These nutrients are often lacking in modern, highly processed diets, making these snacks a functional addition to your pantry. Furthermore, the presence of vitamin B12 makes these a valuable inclusion for those following plant-based diets. Always check the labels for sodium content, as some commercial versions can be surprisingly high in salt.
Culinary Applications and Pairings
Beyond simply eating them from the bag, these chips serve as an excellent vehicle for various toppings. They work beautifully with creamy elements like avocado mash, or cream cheese. The contrast between the crunchy, salty seaweed and the cool, fatty spread creates a balanced bite.
If you prefer savory options, you can experiment with a light brush of teriyaki glaze before baking for a sweet and salty finish. Using them as a garnish on soups or salads adds a professional, restaurant-style aesthetic to home cooking.
Storage and Preservation
Because these chips are hygroscopic, they absorb moisture from the air very quickly. To maintain their signature crunch, store them in an airtight container or a resealable plastic bag immediately after they cool. If you live in a humid climate, placing a food-grade silica packet inside the container can significantly extend their shelf life.
Should they lose their crispness, you can revive them by placing them in a low-temperature oven for 2 to 3 minutes. Never store them in the refrigerator, as the moisture will ruin the texture almost instantly.
Dietary Considerations
For those with specific food allergies, these are naturally among the best gluten-free snacks, provided you use certified tamari instead of standard soy sauce. They are also naturally low in calories, making them a sensible choice for those monitoring their intake. However, it is important to be aware of the iodine levels if you have pre-existing thyroid conditions.
You can find more information on iodine intake recommendations from the National Institutes of Health. Always consult with a healthcare provider if you have concerns about high mineral consumption.
Common Mistakes to Avoid
The most frequent error when making these is using too much oil, which prevents the sheets from becoming truly crispy. A little goes a long way, so aim for a very thin, almost invisible layer. Another common pitfall is over-baking, as nori burns faster than almost any other snack food in the oven.
If the edges start to curl significantly or turn black, remove them immediately, even if the timer hasn’t gone off. Finally, ensure the sheets are completely dry before you begin the oil-brushing process, as any residual moisture will lead to a chewy, rather than crunchy, result.
Frequently Asked Questions
Can I use pre-seasoned nori for this recipe?
It is best to use unseasoned sheets so you can control the salt and oil levels yourself. Pre-seasoned versions often have additives that may burn or taste imbalanced when baked further.
Why do my chips turn out chewy?
Chewiness usually results from either too much oil or insufficient baking time. Ensure your oven is fully preheated and that you are using a light hand with the brush.
Are these chips healthy for children?
They are a great source of minerals, but the sodium content can add up quickly. Serve them in controlled portions rather than giving the entire batch at once.
How long will they stay fresh?
If kept in a truly airtight container, they should remain crunchy for up to one week. After that, they may start to soften due to ambient humidity.
Conclusion
Mastering the art of making these snacks at home is a rewarding way to elevate your pantry with a healthy, flavorful option. By focusing on high-quality ingredients and careful temperature control, you can produce a batch of Nori Chips that rival any premium store-bought variety. They serve as a versatile base for toppings or a standalone treat that satisfies the urge for something salty and crunchy.
Experimenting with different seasonings, such as furikake or smoked paprika, allows you to customize the flavor to your personal preference. Enjoy the process of creating these oceanic delights, and don’t hesitate to share your successful batches with friends and family.
Nori Chips
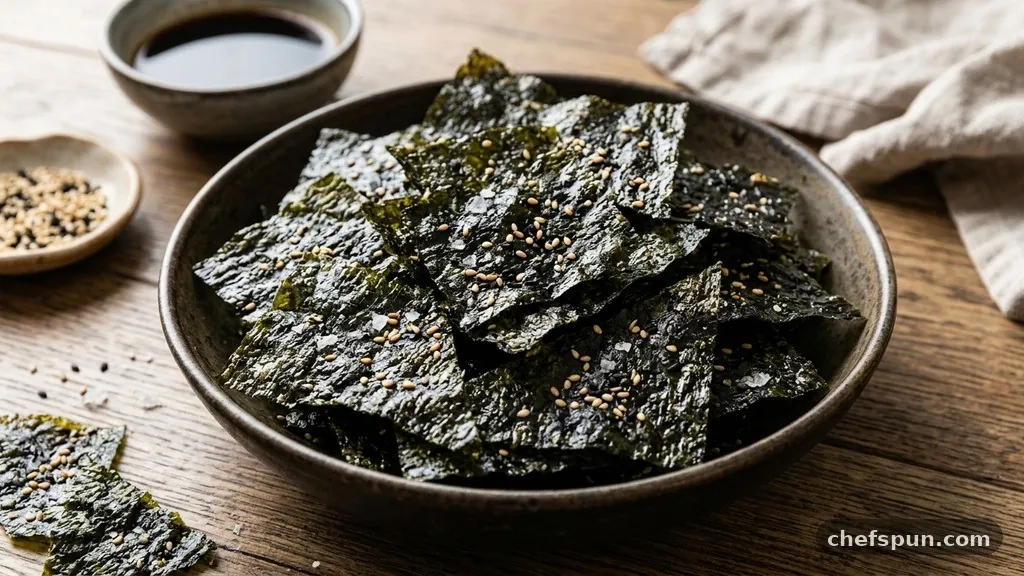
Nori Chips offer a satisfying, crunchy alternative to traditional potato-based snacks, bringing the deep, oceanic essence of the sea directly to your pantry.
Ingredients
- 8 sheets of high-quality, unseasoned toasted nori
- 2 tbsp toasted sesame oil
- 1 tsp fine sea salt
- 1 tbsp tamari or soy sauce
- 1 tbsp maple syrup or honey
- 1/2 tsp garlic powder
- 1/4 tsp chili flakes (optional for heat)
Instructions
- Preheat your oven to 300°F (150°C) and line a large baking sheet with parchment paper to prevent sticking.
- In a small bowl, whisk together the sesame oil, tamari, maple syrup, garlic powder, and chili flakes until the mixture is emulsified.
- Lay out four sheets of nori on a clean, dry cutting board, ensuring they are flat and free of moisture.
- Use a food-safe pastry brush to lightly coat one side of each nori sheet with a thin, even layer of the prepared oil mixture.
- Place another sheet of nori directly on top of the coated sheet to create a double-layered stack, pressing lightly to encourage them to adhere.
- Brush the top of the stacked sheets with a final, very light layer of the oil mixture and sprinkle evenly with the sea salt.
- Use sharp kitchen shears to cut the stacked sheets into your desired chip size, such as squares or long rectangles.
- Arrange the pieces in a single layer on the prepared baking sheet, ensuring they do not overlap.
- Bake for 8 to 10 minutes, checking frequently, until the sheets are crispy and slightly darkened; watch closely to avoid burning.
- Remove from the oven and allow them to cool completely on the tray, as they will crisp up further while resting.
Similar Posts
Healthy Halloween Treats
Finding ways to celebrate the season without relying on processed sugars can transform your holiday experience. Healthy Halloween treats offer a wonderful opportunity to involve the whole family in the kitchen while keeping energy levels stable and spirits high. By focusing on whole foods and creative presentation, you can whip up snacks that are just…
Best Vegan Easter Recipe
Finding the best Vegan Easter Recipe often feels like a challenge, but a vibrant, herb-crusted vegetable roast serves as the perfect centerpiece for your spring celebration. This dish combines earthy seasonal produce with bright, zesty flavors that capture the essence of the holiday. By focusing on fresh, whole-food ingredients, you can create a meal that…
Vegan Butternut Squash Recipes
Exploring the versatility of vegan butternut squash recipes allows home cooks to transform humble, earth-grown produce into sophisticated meals. Whether you are seeking a hearty soup for a cold evening or a vibrant roasted side dish, this gourd provides a naturally sweet foundation that balances beautifully with savory spices. By understanding how to properly caramelize…
Healthy Halloween Treats
Preparing healthy Halloween treats allows you to celebrate the spooky season without the typical post-sugar crash. By focusing on whole foods like fresh fruit, nuts, and natural sweeteners, you can create snacks that look festive while fueling the body properly. Whether you are hosting a party for little ones or looking for a wholesome snack…
Stuffed Dates
Stuffed dates offer a perfect harmony of chewy, natural sweetness and savory richness, making them a standout choice for any gathering. Whether you are hosting an elegant dinner or putting together a casual charcuterie board, these bite-sized treats provide a sophisticated flavor profile that satisfies every palate. By balancing the dense, caramel-like texture of high-quality…
Vegan Brioche Bunnie
Creating a light fluffy Vegan Brioche Bunnie at home transforms your standard sandwich into a gourmet experience. By replacing traditional dairy and eggs with high-quality plant-based alternatives, you achieve that signature rich, golden crumb without any animal products. This recipe is designed to be accessible for home bakers while delivering professional results. You will learn…