Meringue Ghosts
Creating delightful Meringue Ghosts is a fantastic way to bring some seasonal charm into your kitchen. These light, airy treats are essentially crisp, sweetened egg white clouds that melt in your mouth, making them a popular choice for festive gatherings. By whipping simple staples into a stable foam, you can pipe adorable shapes that look impressive but require very little culinary experience.
Whether you are hosting a themed party or simply looking for a fun weekend activity, these cookies offer a perfect balance of crunch and sweetness. They are naturally gluten-free and visually striking, ensuring they become a highlight of any dessert table.
- Prep time: 15 minutes
- Cook time: 30 minutes
- Total time: 45 minutes
- Servings: 4
- Calories: 420 per serving
Ingredients

- 4 large egg whites, at room temperature
- 1/2 tsp cream of tartar
- 1 cup superfine granulated sugar
- 1/2 tsp pure vanilla extract
- 1/4 cup mini chocolate chips or candy eyes for decoration
Instructions

- Preheat your oven to 225°F (107°C) and line a large baking sheet with parchment paper to prevent sticking.
- Place the room temperature egg whites into a clean, dry glass or metal bowl, ensuring no yolk residue is present.
- Use an electric hand mixer or a stand mixer with the whisk attachment to beat the whites on medium speed until they become foamy.
- Add the cream of tartar to the mixture, which helps stabilize the foam structure during the whipping process.
- Increase the mixer speed to medium-high and gradually add sugar one tablespoon at a time, allowing it to dissolve into the whites.
- Continue to beat the mixture until you achieve stiff, glossy peaks that hold their shape when you lift the whisk.
- Gently fold in the vanilla extract using a rubber spatula to ensure the flavor is evenly distributed without deflating the air bubbles.
- Transfer the mixture into a piping bag fitted with a large round tip for the best ghost shape.
- Pipe small mounds onto the prepared baking sheet, pulling the bag upward as you finish each mound to create a peak.
- Bake the cookies for 60 to 90 minutes until they are firm and dry to the touch, but still bright white.
- Turn off the oven and leave the door slightly ajar, letting the meringues cool completely inside for at least one hour.
- Once cooled, use a small dab of melted chocolate to attach the chips or candy eyes, forming your spooky faces.
The Science of Stable Meringue
Achieving the perfect texture for these ghostly treats relies heavily on the chemistry of egg proteins. When you beat egg whites, the proteins unfold and trap air, creating a stable network that expands when heated. Using room temperature egg whites is essential because they whip more easily and reach a greater volume than cold ones.
If you find your mixture is struggling to thicken, check that your bowl is completely free of any residual grease or oil. Even a tiny drop of fat can prevent the proteins from bonding correctly, resulting in a weeping or collapsing foam.
Adding the cream of tartar acts as an acidic stabilizer, which prevents the proteins from over-coagulating and becoming too brittle. This ingredient is your best friend when you want to ensure your meringues hold their definition throughout the long, slow drying process. You should always add the sugar slowly to ensure it dissolves fully into the protein matrix.
If you dump it all in at once, the sugar can weigh down the foam and create a syrupy consistency that won’t hold a pipeable shape. Patience during the beating stage is the secret to success.
Mastering the Piping Technique
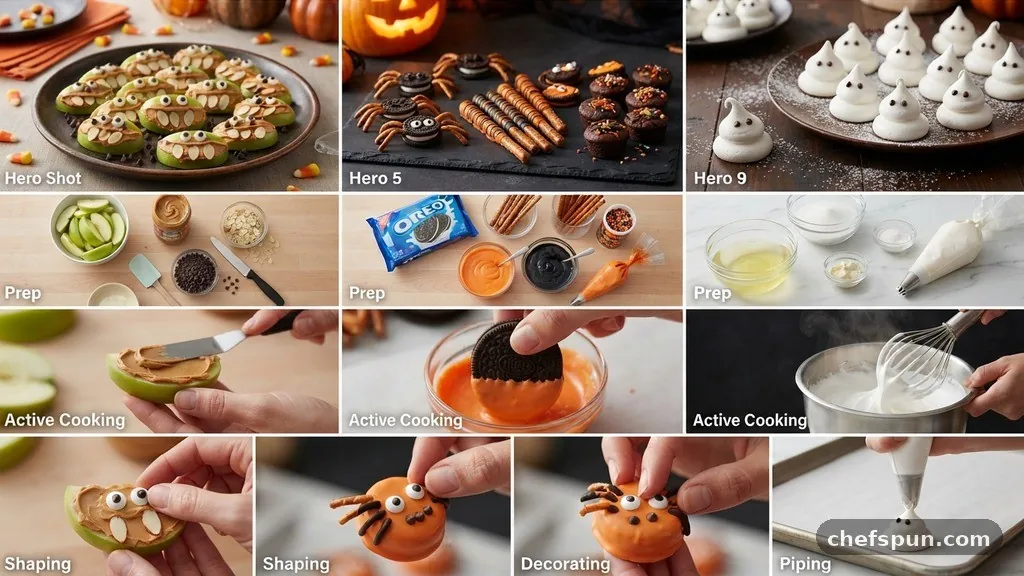
The visual appeal of your ghost cookies depends on how you handle the piping bag. For the best results, use a large plain tip, which allows the meringue to flow out smoothly without obstruction. Position your piping bag vertically over the parchment paper and apply steady, even pressure to create the base of the ghost.
As you move the bag upward, gradually reduce the pressure to create that signature tapering effect at the top. If the peak doesn’t stand up perfectly, you can gently nudge it with a damp finger.
Consistency in size is also important for even cooking. Try to pipe all your shapes to roughly the same volume so they dry out at the same rate in the oven. If you have some tiny ghosts and some large ones, the smaller ones may become over-browned while the larger ones remain soft in the center.
Practice on a plate first if you are new to piping, as the mixture can be re-scooped back into the bag if you aren’t happy with your initial shapes. This control ensures that every ghost looks uniform and professional once they are finished.
The Importance of Low-Temperature Drying
Unlike traditional cookies that rely on baking agents like baking powder or soda, meringues are essentially dried foams. This is why you must use a very low oven temperature, usually around 225°F, to evaporate moisture without browning the surface. If the heat is too high, the sugar will caramelize, turning your white ghosts into tan or brown ones.
Slow evaporation creates that signature crisp, shatter-like texture that makes these cookies so satisfying to eat. You can learn more about the chemical structure of egg foams to understand why this process is so effective.
Leaving the cookies in the oven after the heat is turned off is a critical step that many beginners overlook. This gradual cooling process allows the remaining moisture to escape without shocking the structure, which can cause cracking. If you remove them from the oven too quickly, the sudden change in temperature can cause the meringues to collapse or become sticky.
Think of the oven as a drying chamber rather than a traditional baking environment. The longer they sit in that cooling air, the crunchier and more stable they will become.
Storage and Freshness
Because meringues are made mostly of sugar, they are extremely hygroscopic, meaning they absorb moisture from the air. This makes them prone to becoming soft or tacky if left out in a humid environment for too long. To keep your ghosts crisp, store them in an airtight container at room temperature as soon as they have fully cooled.
A glass jar or a sealed plastic box works well, provided it is kept in a dry, cool area of your kitchen. Avoid storing them in the refrigerator, as the high humidity will ruin the texture within a few hours.
If you are planning to make these for a special event, you can bake them up to a week in advance. They hold their crunch remarkably well when sealed properly, allowing you to focus on other party preparations. If you notice they have lost their crispness, you can sometimes revive them by putting them back into a warm oven at 200°F for about 15 minutes.
This will dry out any absorbed moisture and restore that delightful, light texture. Just be sure to watch them closely so the sugar doesn’t start to brown during this second drying phase.
Common Troubleshooting
One of the most common issues is the meringue “weeping” or leaking a sugary syrup at the base. This usually happens when the sugar hasn’t fully dissolved into the egg whites during the mixing process. To test if your sugar is ready, rub a small amount of the mixture between your thumb and forefinger; if it feels gritty, keep beating.
Another frequent problem is the meringues cracking on the surface while baking. This is often caused by the oven temperature being slightly too high, causing the air inside the cookies to expand too quickly.
If your ghosts seem to be melting or losing their shape on the tray, your oven might have been too humid during the process. Ensure the oven door is not opened frequently, as this lets out the dry heat and introduces moisture from the room. If you find your ghosts are consistently turning yellow, check your oven calibration or consider using a slightly lower heat setting.
Sometimes, the vanilla extract can add a slight tint, so if you are aiming for a pure, bright white, you can omit it or use a clear imitation variety. Adjusting these small variables will lead to much better results over time.
Frequently Asked Questions
Can I use a hand mixer instead of a stand mixer?
Yes, a hand mixer works perfectly well for this recipe. It may take a few minutes longer to achieve the stiff peaks, so be prepared to hold the mixer for a bit longer while you incorporate the sugar.
What should I do if I don’t have cream of tartar?
You can substitute the cream of tartar with an equal amount of lemon juice or white vinegar. These acidic ingredients serve the same purpose of stabilizing the egg white proteins during the whipping process.
Why did my meringues turn out chewy instead of crisp?
Chewy meringues usually indicate that they didn’t bake or dry long enough in the oven. Ensure you are leaving them in the cooling oven for the full duration, and avoid taking them out until they are completely dry and hard.
Can I add food coloring to the mixture?
Yes, you can add a drop of gel food coloring once the stiff peaks have formed. Be sure to fold it in gently so you don’t deflate the air you have worked so hard to incorporate.
Are these cookies safe for people with nut allergies?
This recipe is naturally nut-free, making it a safe choice for most people with nut allergies. Always double-check the labels on your chocolate chips or candy eyes to ensure they were not produced in a facility that processes nuts.
Conclusion
Mastering the art of Meringue Ghosts is a rewarding process that relies on patience and precision. By focusing on the texture of your egg whites and ensuring a slow, steady drying time in the oven, you can produce professional-quality treats that are as fun to look at as they are to eat. These cookies are a delightful addition to any seasonal celebration, offering a light and sweet experience that guests of all ages will enjoy.
Feel free to experiment with different decorating styles, such as using cocoa powder or colored icing to give each ghost a unique personality. Whether you are a baking novice or a seasoned expert, these simple steps will help you achieve the perfect batch every time. Happy baking and enjoy your spooky creations.
Meringue Ghosts
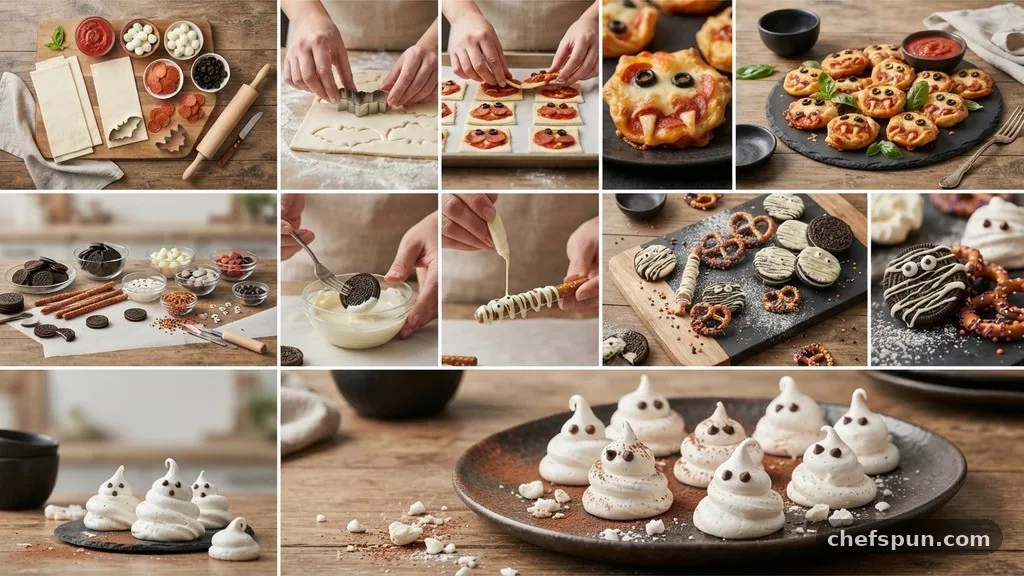
Creating delightful Meringue Ghosts is a fantastic way to bring some seasonal charm into your kitchen. These light, airy treats are essentially crisp, sweetened egg white clouds that melt in your mouth, making them a popular choice for festive gatherings.
Ingredients
- 4 large egg whites , at room temperature
- 1/2 tsp cream of tartar
- 1 cup superfine granulated sugar
- 1/2 tsp pure vanilla extract
- 1/4 cup mini chocolate chips or candy eyes for decoration
Instructions
- Preheat your oven to 225°F (107°C) and line a large baking sheet with parchment paper to prevent sticking.
- Place the room temperature egg whites into a clean, dry glass or metal bowl, ensuring no yolk residue is present.
- Use an electric hand mixer or a stand mixer with the whisk attachment to beat the whites on medium speed until they become foamy.
- Add the cream of tartar to the mixture, which helps stabilize the foam structure during the whipping process.
- Increase the mixer speed to medium-high and gradually add sugar one tablespoon at a time, allowing it to dissolve into the whites.
- Continue to beat the mixture until you achieve stiff, glossy peaks that hold their shape when you lift the whisk.
- Gently fold in the vanilla extract using a rubber spatula to ensure the flavor is evenly distributed without deflating the air bubbles.
- Transfer the mixture into a piping bag fitted with a large round tip for the best ghost shape.
- Pipe small mounds onto the prepared baking sheet, pulling the bag upward as you finish each mound to create a peak.
- Bake the cookies for 60 to 90 minutes until they are firm and dry to the touch, but still bright white.
- Turn off the oven and leave the door slightly ajar, letting the meringues cool completely inside for at least one hour.
- Once cooled, use a small dab of melted chocolate to attach the chips or candy eyes, forming your spooky faces.
Similar Posts
Black Bean Brownie
A black bean brownie serves as a clever bridge between indulgent dessert and fiber-rich nutrition. You might wonder if legumes have a place in a chocolate treat, but the results are surprisingly fudgy and rich. By replacing traditional flour with pureed beans, you create a dense, moist texture that satisfies any chocolate craving without the…
Chocolate Chickpea Flour Cookies
Baking with legumes might sound unusual, but chocolate chickpea flour cookies offer a surprisingly rich, fudgy texture that rivals traditional flour-based treats. By using chickpea flour as a base, you gain a protein-packed snack that is naturally gluten-free and incredibly satisfying. These cookies balance an earthy base with the decadence of dark cocoa, making them…
Chocolate Hazelnut Cookies
Baking a batch of homemade Chocolate Hazelnut Cookies brings a sophisticated twist to the classic pantry staple. These treats balance the deep, earthy richness of roasted nuts with the smooth sweetness of cocoa, creating a flavor profile that is nearly impossible to resist. Whether you are prepping for a holiday gathering or simply satisfying a…
Almond Thumbprint Cookies
Baking a batch of Almond Thumbprint Cookies provides a wonderful sensory experience that fills your home with the warm, nutty aroma of toasted nuts and sweet fruit. These treats balance a buttery, tender base with the bright intensity of preserves, making them a sophisticated yet approachable dessert. Whether you are prepping for a holiday cookie…
Healthy Halloween Treats
Finding ways to celebrate the season without relying on processed sugars can transform your holiday experience. Healthy Halloween treats offer a wonderful opportunity to involve the whole family in the kitchen while keeping energy levels stable and spirits high. By focusing on whole foods and creative presentation, you can whip up snacks that are just…
Easy Halloween Desserts
Finding simple ways to celebrate the season doesn’t mean you need to spend hours in the kitchen. Preparing easy Halloween desserts allows you to focus on the festive atmosphere while still serving something delicious that guests of all ages will appreciate. Whether you are aiming for spooky or sweet, these recipes provide a stress-free path…